Configure Email Integration Using Office 365 with Exchange
Overview
The following article provides a reference on how to configure Bizagi's Email Integration functionality using Microsoft Exchange, through Azure Active Directory (AAD).
Specifically, it demonstrates how to implement the OAuth 2.0 client_credential flow to access Office 365 via Exchange, using the Aspose email client, to monitor the mailbox without any user interaction.
The main steps in Bizagi to use email integration (such as establishing the connection to your email SMTP server or ensuring that your task has the ideal features for email integration) are described in the section.
Important: Microsoft has stopped supporting basic authentication for Office 365 mailbox access.
To support your Email integration feature, you need to create a support ticket, requesting the version that contains the Email Integration change. Then, follow the steps described in this article.
Apply Keys for the Exchange Configuration in the Bizagi Scheduler
After installing the latest version that includes the Email Integration change, place the following keys in the Bizagi Scheduler .config:
key="EmailIntegrationIdApp" value="APPLICATION_ID"
key="EmailIntegrationTenantId" value="TenantId"
key="EmailIntegrationClientSecret" value="client Secret encrypted"
key="EmailIntegrationWebmailDefault" value="https://outlook.office365.com/.default"
Configuration for Microsoft Exchange
Follow these steps below to configure your Exchange.
Prerequisites
- You must have an Azure Cloud Application Administrator, Application Developer, or Administrator role to configure the client application.
- You must have a Global Administrator role to grant the permissions to the application that will have access to the mail through the OAuth2 authentication of the client_credential flow.
- One mailbox must be configured per project. That is, if you have two projects, each one must not have the same configuration. One way to differentiate them is by using a different Exchange mail account.
What You Need to Do in Azure
- Register an app with the Microsoft identity platform
- Add Permissions to the Application
- Create the "Client Secret"
- Identify Application Data
- Register Core Services in Exchange
What You Need to Do in Bizagi
- Change Bizagi Studio Configuration
- Apply Keys for the Exchange Configuration in Bizagi Scheduler
1. Register an App with the Microsoft Identity Platform
The Azure account used must have permissions to manage applications in Azure Active Directory (Azure AD). Any of the following Azure AD roles includes the necessary permissions:
-
Application Manager
-
Application Developer
-
Cloud Application Manager
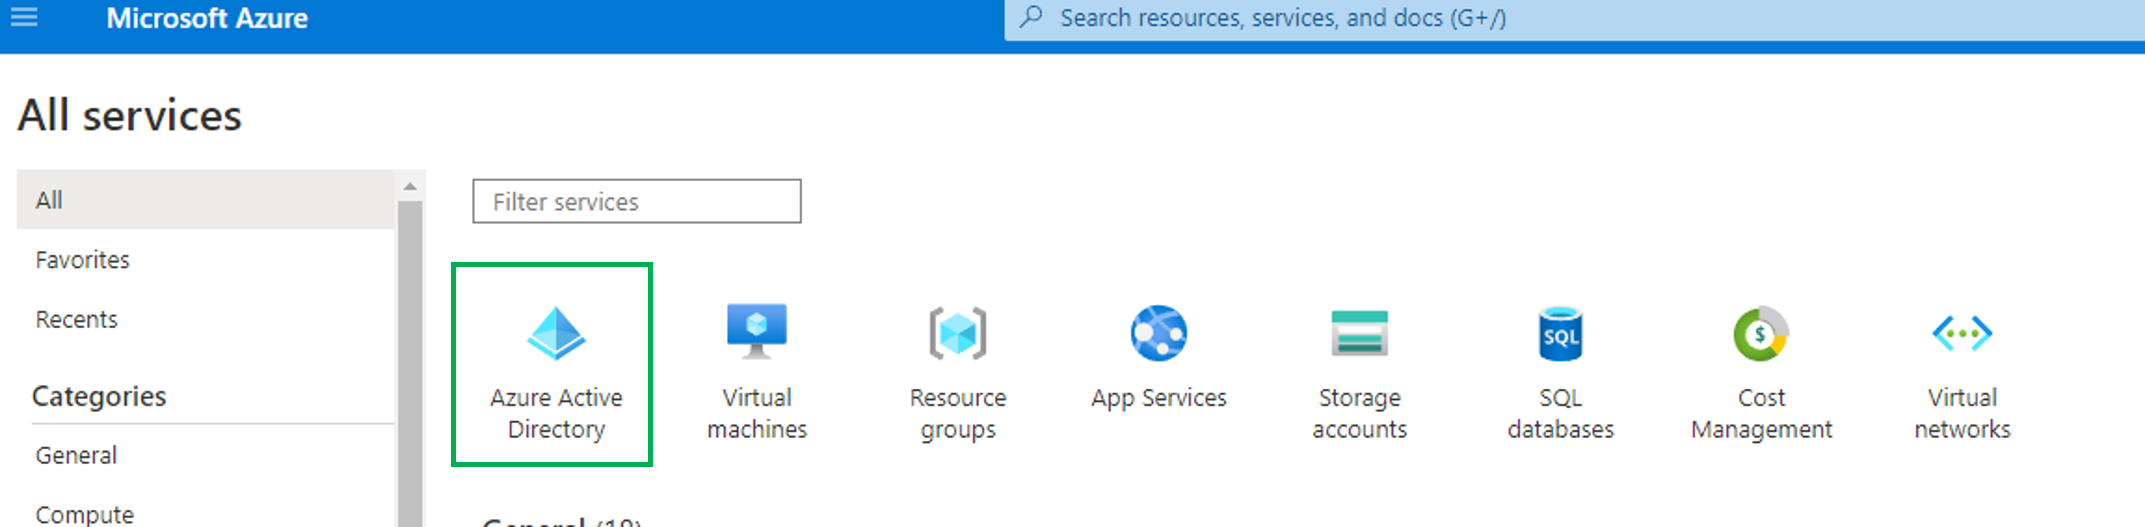
1.1 Sign in to the Azure portal.
1.2 Search for and select Azure Active Directory.
1.3 In the Manage section, select App registrations > New registration.
1.4 Enter the name of the app. Example: Bizagi App 1 > Register.
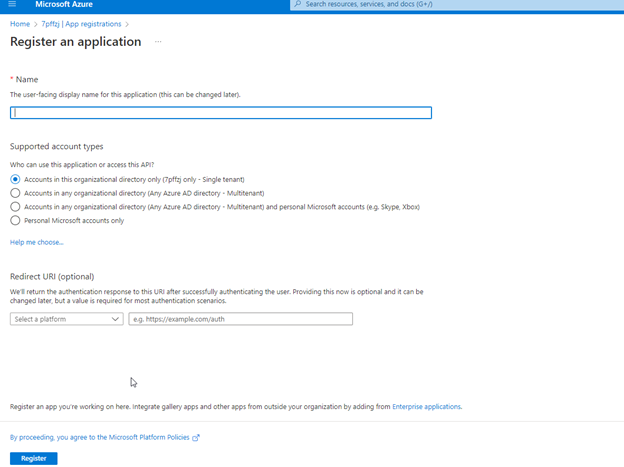
For more information, follow the official Microsoft documentation: Quickstart: Register an app.
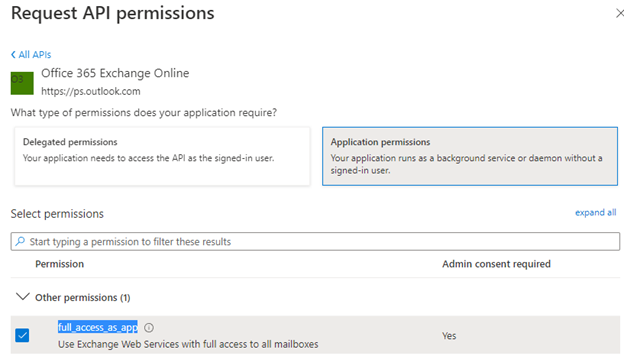
2. Add Permissions to the Application
2.1 Select: API permissions > Add a permission > APIs my organization uses > Office 365 Exchange Online.

2.2 Select: Application permissions > Other permissions > full_access_as_app > Add permissions.
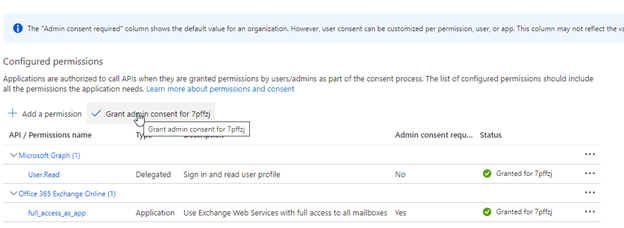
2.3 Select: Grant admin consent for "your organization". Permissions added successfully should look like the image below:
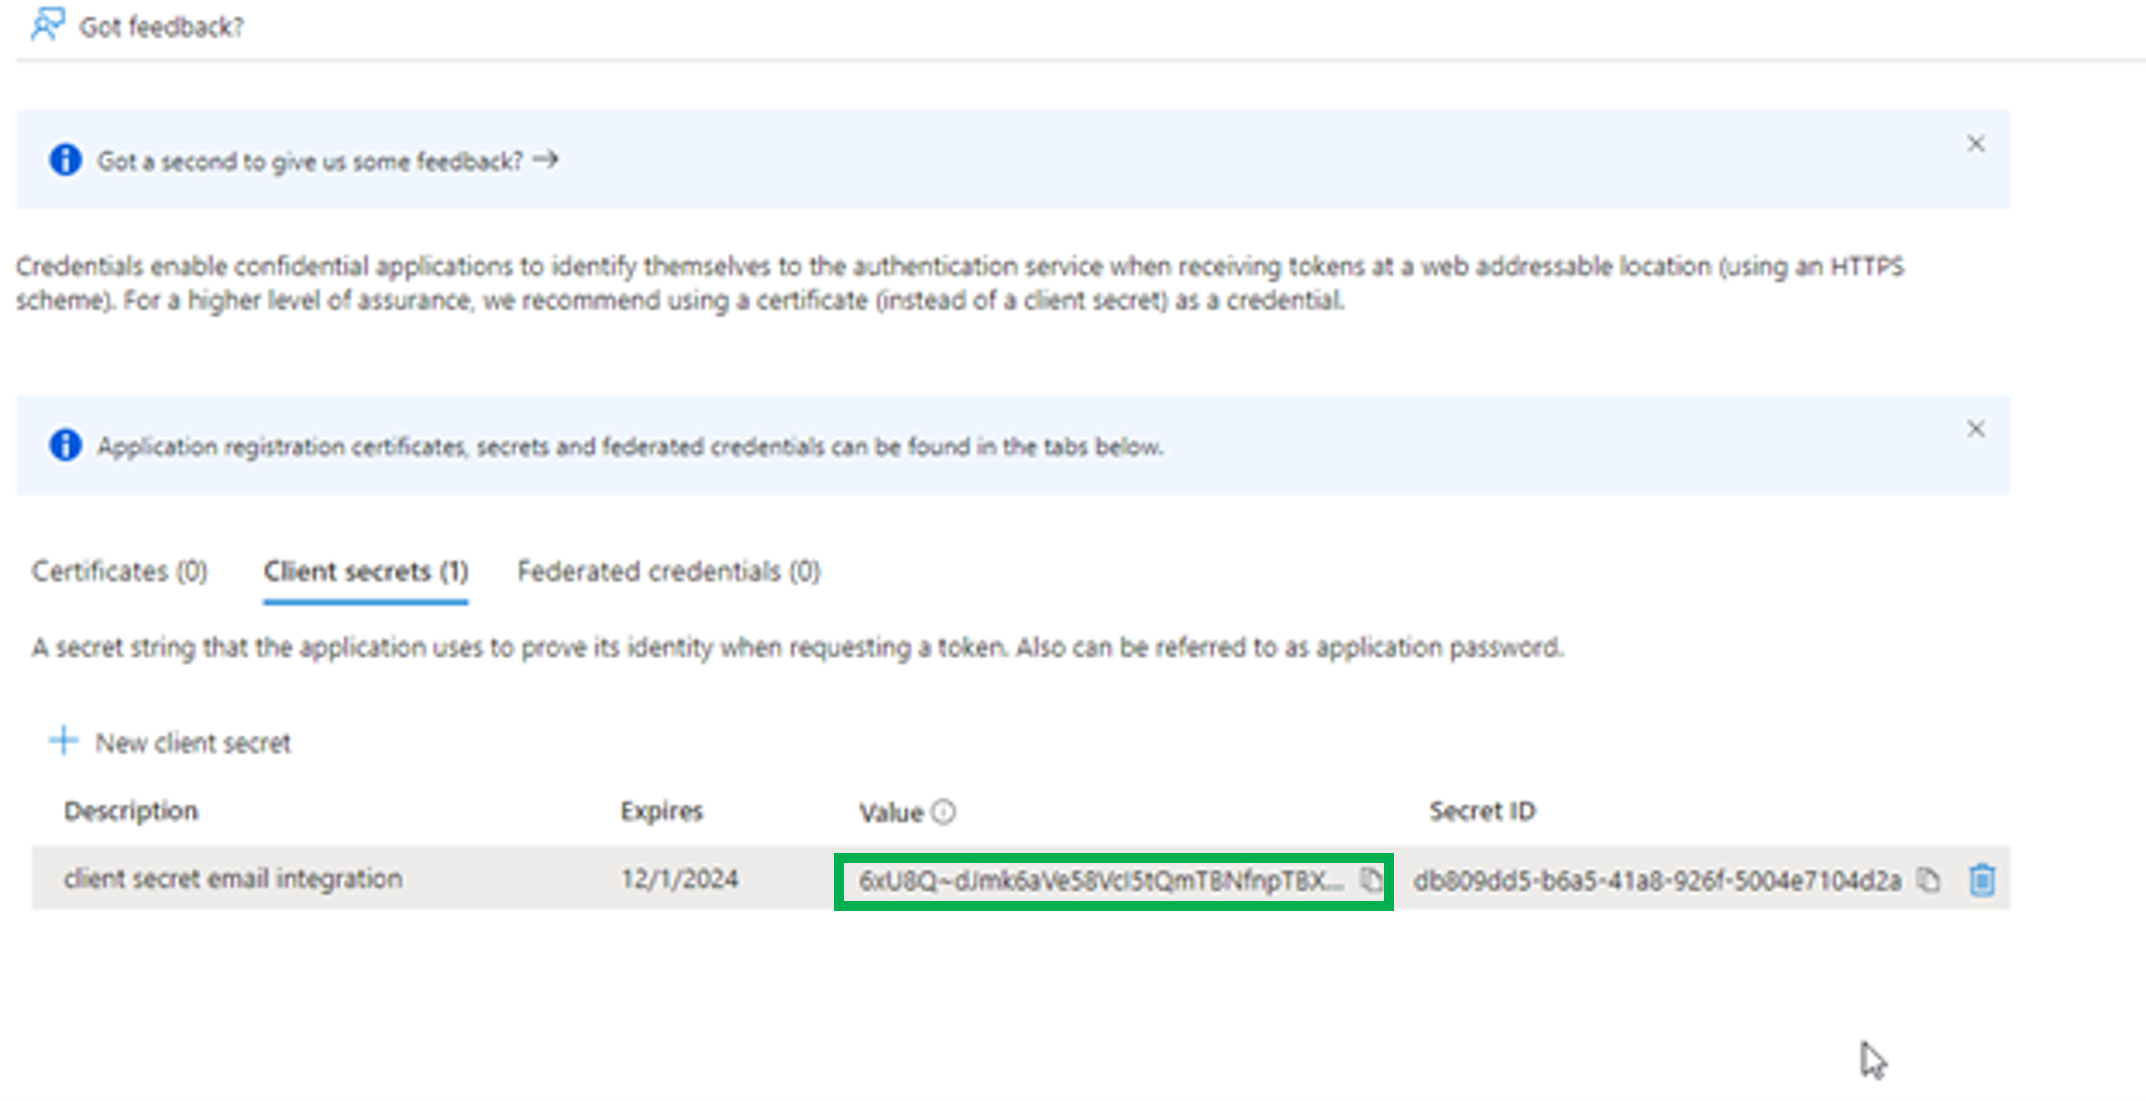
3. Creation of the "Client Secret"
3.1 Select Certificate & secrets > New client secret > (add description) > (modify expiration time) > Add.

3.2 Copy the value of the client secret, as once you leave the page, it will not be visible.
4. Identify Application Data
4.1 Select: Home > Active Directory.
4.2 Select the created application: EmailIntegrationOAth2SB.
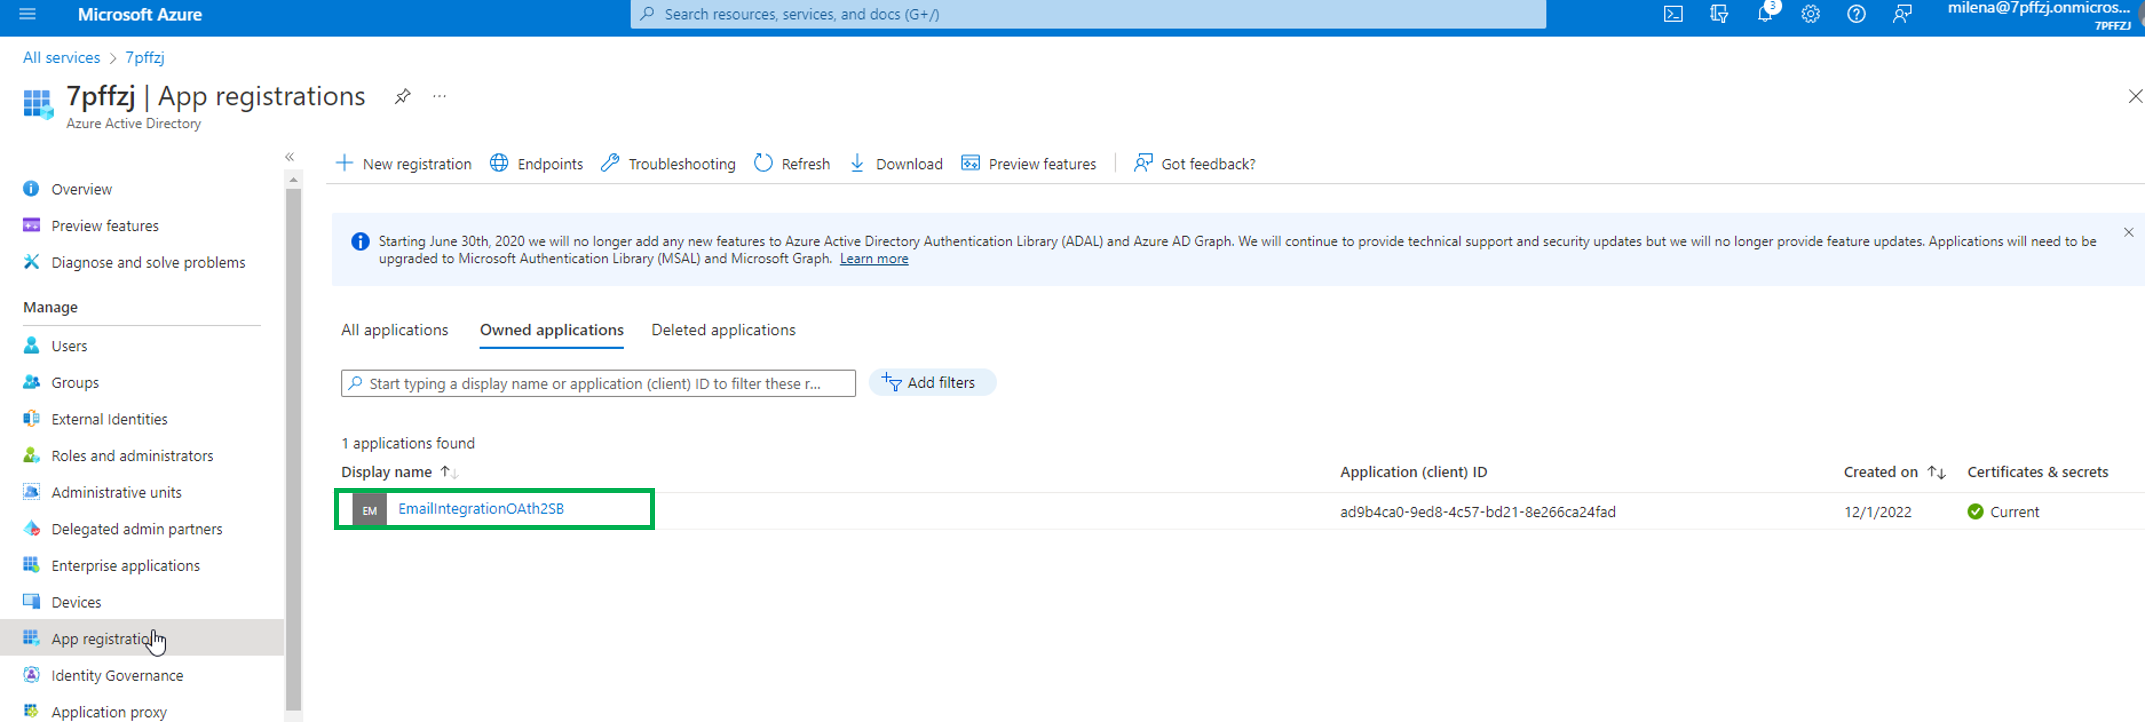
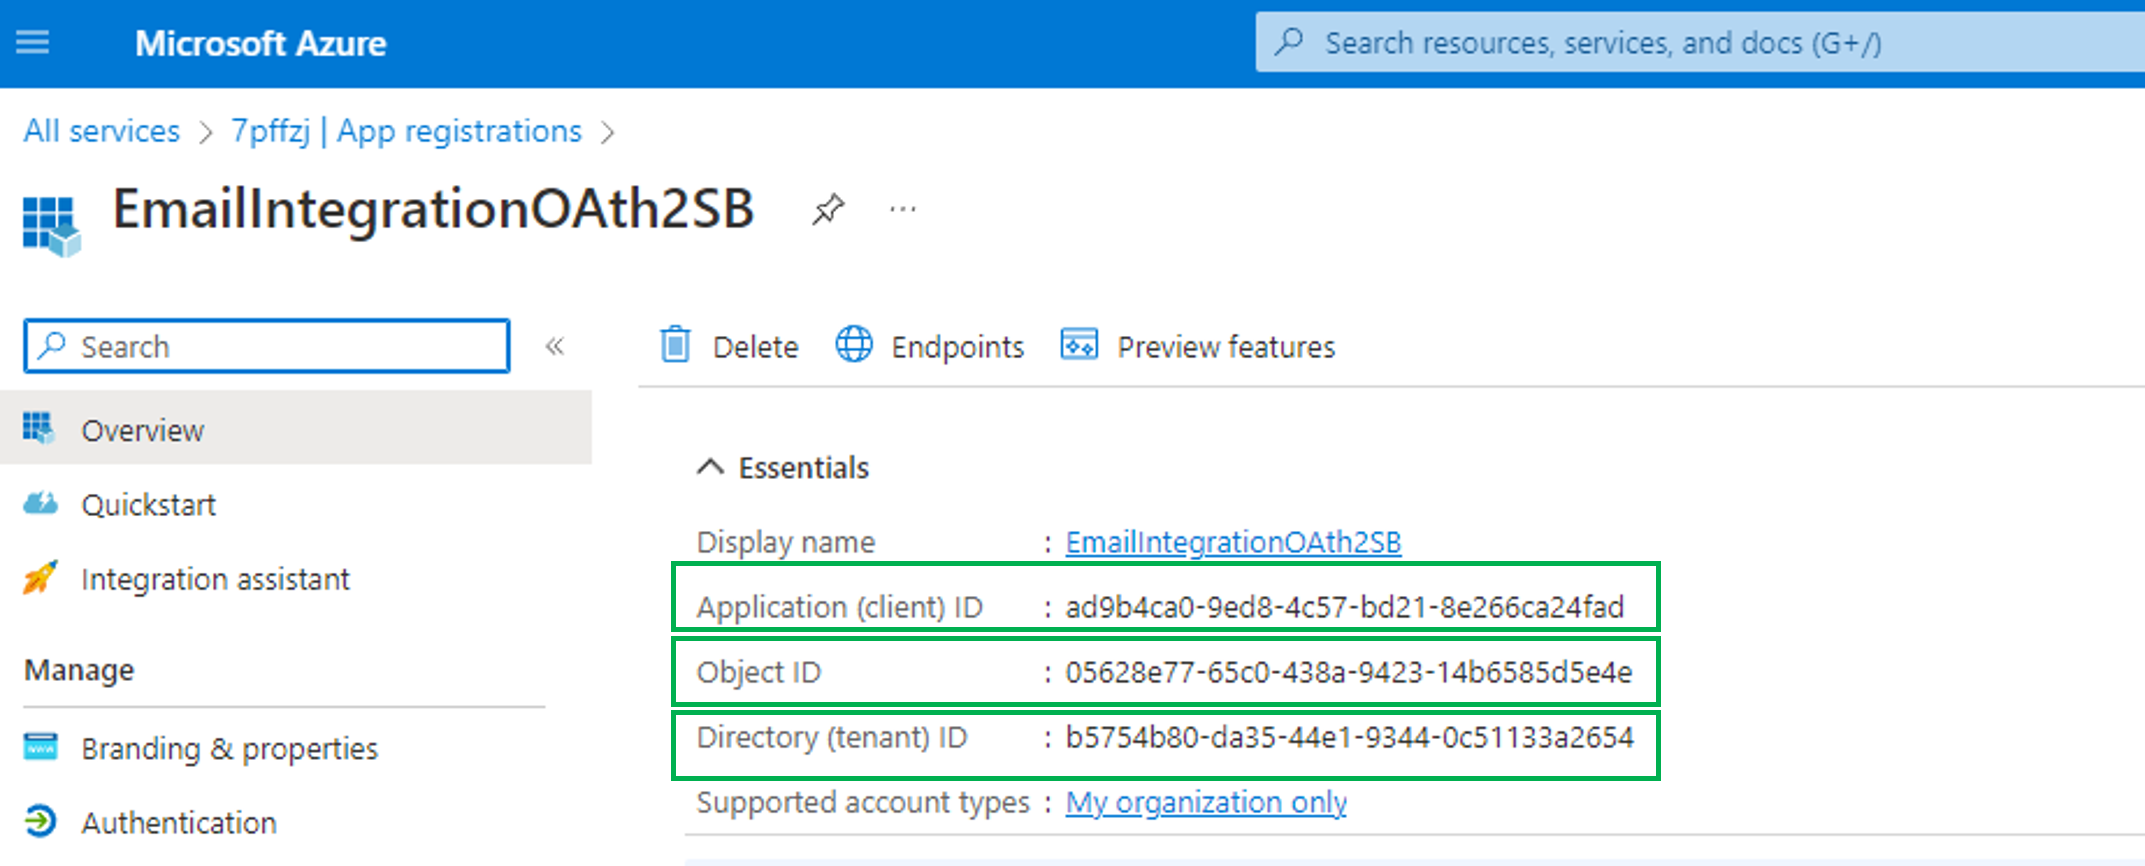
The next image identifies important data for the next step.
5. Register Core Services in Exchange
Use Windows PowerShell (run as administrator) to register service principals with Exchange.
5.1 Set the execution policy:
Set-ExecutionPolicy RemoteSigned
5.2 Install the ExchangeOnlineManagement module
To install and import the ExchangeOnlineManagement module, run the following commands:
Install-Module -Name ExchangeOnlineManagement
Import-Module ExchangeOnlineManagement
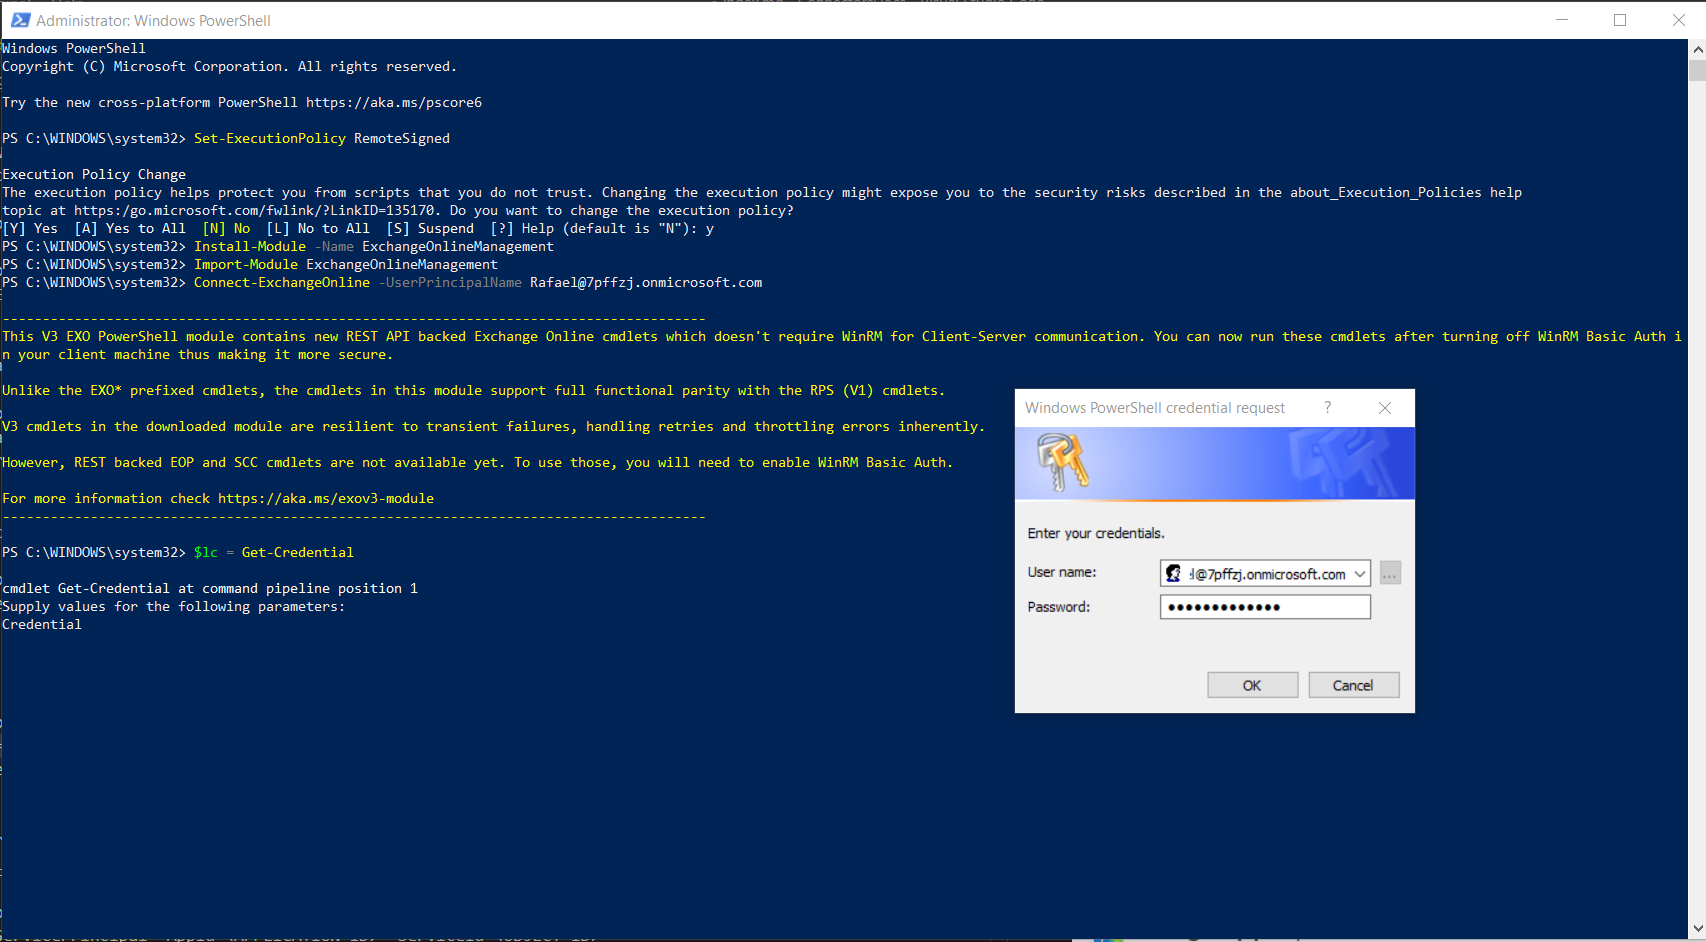
5.3 Connect and log in as administrator (you will be prompted for a password):
Connect-ExchangeOnline -UserPrincipalName your-admin-account@your-domain.onmicrosoft.com
5.4 For Exchange running in hybrid mode, sign in with the following code:
If you're running Exchange in hybrid mode, use the following commands to sign in:
$lc = Get-Credential
Connect-ExchangeOnline -Credential $lc
5.5 Create service entity. You need to get the Application Data
New-ServicePrincipal -AppId <APPLICATION_ID> -ServiceId <OBJECT_ID>
If you get an error running the New-ServicePrincipal cmdlet after performing these steps, it's probably because the user doesn't have enough permissions in Exchange Online to perform the operation. By default, this cmdlet is available to users who have been assigned the management role.
For this example:
New-ServicePrincipal -AppId ad9b4ca0-9ed8-4c57-bd21-8e266ca24fad -ServiceId b5754b80-da35-44e1-9344-0c51133a2654
To limit permissions to a specific mailbox: Running the following command causes the system to restrict access to all mailboxes except mailboxes that are in the security group:
5.6 Identify the ID. (client) application name in the Azure application registration portal.
5.7 Create a new mail-enabled security group, or use an existing one, and identify the group's email address.
New-ApplicationAccessPolicy -AppId <APPLICATION_ID> -PolicyScopeGroupId "<USER@your-domain.onmicrosoft.com>" -AccessRight RestrictAccess -Description "Description"
For the example:
New-ApplicationAccessPolicy -AppId ad9b4ca0-9ed8-4c57-bd21-8e266ca24fad -PolicyScopeGroupId "AdeleV@7pffzj.onmicrosoft.com" -AccessRight RestrictAccess -Description "Restrict this app to members of distribution group EvenUsers."
5.8 Test the newly created application access policy:
Test-ApplicationAccessPolicy -Identity "AdeleV@7pffzj.onmicrosoft.com" -AppId <APPLICATION_ID>
For our example:
Test-ApplicationAccessPolicy -Identity "<USER@your-domain.onmicrosoft.com>" -AppIdad9b4ca0-9ed8-4c57-bd21-8e266ca24fad
You should use Test-ApplicationAccessPolicy for each security group you need to access
New-ApplicationAccessPolicy -AppId <APPLICATION_ID> -PolicyScopeGroupId "<USER@your-domain.onmicrosoft.com>" -AccessRight RestrictAccess -Description "Description"
Changes to application access policies can take more than 1 hour to take effect on Microsoft Graph API REST calls, even when Test-ApplicationAccessPolicy returns positive results.
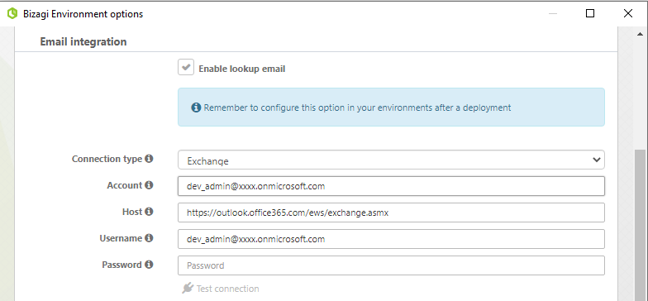
6. Change Bizagi Studio configuration
Enter the Environment configuration option in Bizagi Studio.
Update the information with the account created, keeping the Connection type as Exchange.
The password must be left blank.